Is Raid Harmful to Dogs
Apr
Is Raid Harmful to Dogs? What I’ve Seen in Real Homes

I run a small mobile dog-grooming van and also do in-home visits for anxious dogs, so I spend a lot of time in other people’s houses. Over the years, I’ve walked into living rooms that smell faintly of bug spray, kitchens with fresh insect traps, and bedrooms where aerosol cans are still sitting on the nightstand. One question comes up more often than you’d think. Is Raid actually harmful to dogs? From what I’ve seen up close, the answer is not as simple as yes or no.

What Raid Does in a Home With Dogs Around

Most Raid products are designed to kill insects quickly, which means they contain chemicals that disrupt insects’ nervous systems. The problem is that dogs also have nervous systems, and while they are less sensitive than insects, they are not immune. I’ve noticed that even a light spray in a small room can linger longer than people expect. Dogs spend a lot of time close to the floor, right where those residues settle.

A customer last winter used a spray along her baseboards to get rid of ants. Her dog didn’t lick the walls, but he did lie against them while napping. Within a day, she noticed mild drooling and restlessness. It wasn’t dramatic, but it was enough to call the vet. Small exposures matter.

Some dogs react more than others. A large, healthy dog might show no symptoms after brief exposure, while a smaller or older dog could react within hours. In multi-dog homes, one dog might stay normal while another seems off.

How Dogs Actually Get Exposed

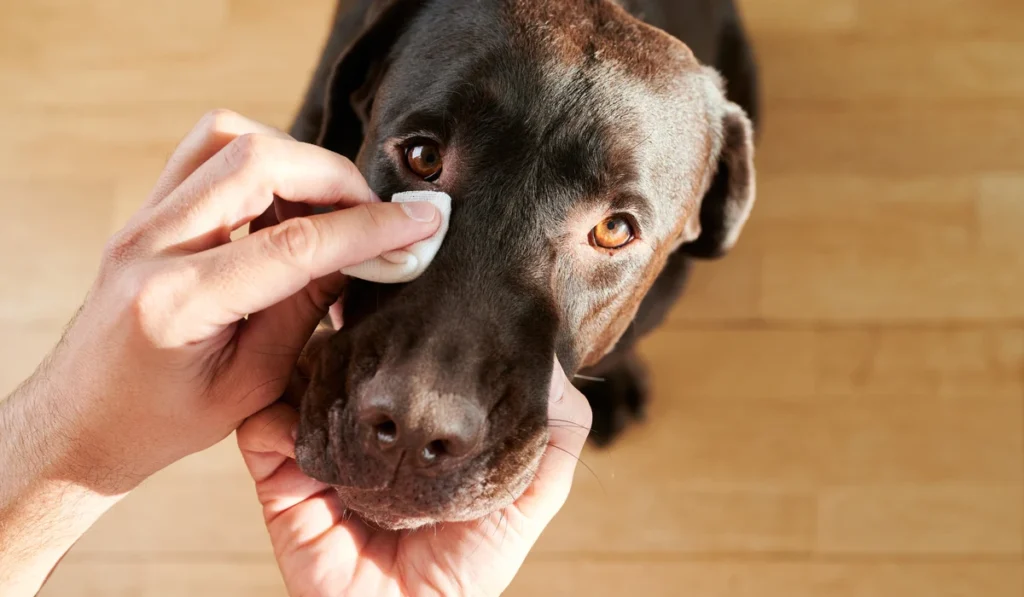
People often assume the risk only comes from direct spraying, but that’s rarely the full story. Residue sticks to surfaces, and dogs explore with their noses and paws. I once groomed a spaniel that kept rubbing his face on the carpet after a recent treatment. The floor told a different story.

If you want a clear breakdown of how these exposures occur, I usually point people to Is Raid Harmful to Dogs, which explains the different ways pets come into contact with household chemicals in plain language.

There are a few common exposure paths I see repeatedly:

Dogs licking their paws after walking on treated areas is a major issue. Inhalation comes next, especially in poorly ventilated rooms where spray particles hang in the air longer than expected. Then there’s indirect contact, like lying on rugs or bedding that has absorbed the chemical.

Even toys can pick it up. That part surprises people. I’ve seen chew toys left on treated floors that later carried a faint chemical smell.

Is Raid Harmful to Dogs

Symptoms I’ve Personally Noticed in Dogs

Symptoms are usually mild but noticeable. Common signs include drooling, which can start within hours of exposure. Some dogs become quieter or restless.

In a more serious case, a client canceled an appointment because her dog began trembling and vomiting after heavy indoor spraying. The situation required immediate vet attention. While rare, severe reactions do happen.

Here are a few signs I tell clients to watch for:

Excessive licking or drooling, shaky movements, sudden tiredness, and loss of appetite. If more than one of these shows up at the same time, I suggest not waiting it out. Call a professional.

Short exposure can still cause a reaction. That’s the tricky part. You don’t always need a large dose.

Are Some Raid Products Safer Than Others?

Not all Raid products are identical, and that matters. Some are aerosol sprays, while others are bait traps or gels. From what I’ve seen, sprays tend to pose a greater immediate risk because they spread into the air and settle on surfaces. Baits, on the other hand, are more contained but can still be risky if a curious dog gets into them.

I remember a Labrador that chewed through a plastic bait station. The dog was fine after a vet check, but it could have gone worse. Dogs are persistent. If something smells interesting, they will investigate.

Labels do provide guidance, but many people skim them or assume the instructions are overly cautious. I’ve learned that those instructions are there for a reason. Leaving a room ventilated for a full hour rather than 10 minutes makes a difference.

What I Tell Clients Who Use Raid Anyway

I understand that people need to deal with insects. I’m not here to tell anyone to live with a roach problem. But I do suggest a few habits that reduce risk without making life complicated. First, remove your dog from the area before spraying. Not just to another corner. A completely different room or, if possible, outside.

Second, give it time. I usually recommend at least an hour before letting the dog back in, even if the product says it dries quickly. Air circulation matters more than people think. Open windows if you can.

Third, wipe down surfaces your dog touches often. Floors, bedding, and low furniture are the main ones. It takes a few extra minutes, but it reduces residue.

I’ve seen these steps prevent problems. They are simple, but they work.

When I Suggest Skipping Raid Entirely

There are situations where I advise clients to avoid sprays altogether. Homes with puppies are one. Puppies lick everything. They explore with their mouths, and that makes them more vulnerable. Senior dogs with health issues are another group where I would be cautious.

Some dogs already have skin sensitivities or respiratory issues. In those cases, even mild exposure can trigger a reaction. I once worked with a bulldog that started wheezing after a routine spray in the house. It didn’t take much.

Alternative pest control methods exist, and some are less invasive. Sticky traps, targeted treatments, or professional pest services that use pet-safe protocols can be better options in certain homes.

I’m not saying Raid is always dangerous, but it’s often underestimated in homes with dogs. Understanding how it works—especially where your dog sleeps and plays—is key to keeping your pet safe.d.

Ultimately, the safest approach is to pay close attention to your dog’s behavior after any pest treatment. If you notice something off—even if it seems minor—take action quickly. Trust your instincts and involve a vet whenever you’re unsure. Small steps can make a big difference for your dog’s health.

Is Pismo Beach Dog Friendly
Apr
Is Pismo Beach Dog Friendly for Real Travel Days

I run a small dog walking and boarding service on California’s Central Coast, and I have taken more than a few dogs on day trips to Pismo Beach over the years. Some trips were smooth. Others taught me what not to do. People ask me all the time if Pismo Beach is actually dog-friendly or if it just sounds that way online. My answer usually starts with yes, but it depends on how you plan your day.

What the Beach Is Like With Dogs

Pismo Beach has a wide stretch of sand, which alone makes it easier to manage dogs than in tighter coastal spots. I have walked up to two miles along the shoreline with a pair of medium-sized dogs without feeling crowded, even on a busy afternoon. That space matters when you are handling excited dogs that want to run, dig, and chase waves.

Dogs are allowed on the beach, but leash rules apply in most areas. I keep a six-foot leash on hand because it tends to match local expectations and gives me enough control without limiting movement too much. Some owners let their dogs off-leash, especially early in the morning, but I have seen this lead to awkward situations with less social dogs.

Sand, saltwater, and wind all play a role in how your dog handles the outing. I have had one dog that loved the water but refused to walk on wet sand after the first 20 minutes, so I had to carry it part of the way back. Not every dog reacts the same. Some love it instantly, others need time to adjust.

Where I Stay and What I Look For Nearby

Accommodation matters. Not every place that allows dogs makes it easy. Some inns and rentals have restrictions that make tasks, such as early-morning walks, more difficult. I always check this before booking.

A colleague once mentioned that she found a reliable list of options on Is Pismo Beach Dog Friendly while planning a longer stay, and she ended up booking a place with direct outdoor access rather than long indoor hallways. That detail made her trip smoother because her dog did not have to navigate elevators or tight spaces before reaching fresh air. Those small differences matter more than people think.

I look for three things every time. Easy outdoor access, nearby walking routes, and clear pet rules. If a place charges a fee, I do not mind, but I want to know upfront what is expected. I have paid anywhere from a small nightly fee to a flat rate for a full stay, and the experience varied more by layout than by cost.

Food spots vary. Some cafes allow dogs on patios, others do not. I bring a collapsible water bowl and a small mat so the dog can settle while I grab food.

Is Pismo Beach Dog Friendly

Best Times of Day to Bring a Dog

Early morning works best. That is not a guess. I arrived around 7 a.m. on a summer day and found long stretches of nearly empty beach, which gave the dogs space to explore without constant distractions. By late morning, the crowd builds, and things change quickly.

Afternoons get busy, especially on weekends. I have seen dozens of dogs in one area, which has changed the dynamic. Some dogs thrive; others get overwhelmed. I prefer quieter windows where I can control the pace.

Weather plays a role, too. Coastal wind picks up in the afternoon more often than people expect. I have cut a few outings short because the sand started blowing hard enough to bother both the dogs and me. Not fun.

Sun exposure is another factor. I once tracked a two-hour outing in which the sand temperature rose enough to make a smaller dog lift its paws repeatedly, which was my cue to head back. Timing is not just about crowds. It is about comfort.

Things That Can Catch You Off Guard

Pismo Beach feels relaxed, but details can trip you up. Parking is one; I have circled for 15 minutes during peak times, which isn’t ideal with a dog in the car. Planning your parking spot saves stress.

Wildlife matters. Birds can trigger a dog’s chase instinct—one dog ignored every recall cue for several seconds while zeroing in on seagulls. Leash control is essential.

Clean-up rules are strict. I always carry at least three waste bags, even for short walks. People often underestimate how many they need—especially with multiple dogs.

Water access can be limited. I always bring my own. One liter is often not enough for longer, more active, or warmer outings.

My Honest Take After Multiple Visits

Pismo Beach is dog-friendly, but it rewards preparation. I enjoy taking dogs there because the space and atmosphere give them room to move and explore in ways that smaller parks cannot match. Still, I do not treat it as a casual drop-in spot. A little planning goes a long way.

Each dog reacts differently. I have had calm, easy walks, and I have also had to adjust plans on the fly when dogs didn’t handle the environment. That unpredictability shapes every trip.

If you approach your visit with a clear plan and awareness, you and your dog can genuinely enjoy Pismo Beach. Preparation and attentiveness make all the difference for a safe, memorable outing.

After all these trips, I keep coming back because the experience is worth it. For any dog owner ready to put in a little thought, Pismo Beach can be a rewarding adventure.

Dog’s Eye Goopy
Apr
Why Is My Dog’s Eye Goopy, and Should I Worry

I run a small home-based dog boarding service, and one of the first things I check during intake is a dog’s eye condition. Goopy eyes are more common than people expect. Sometimes it is harmless and clears with a quick wipe. Other times, it signals something deeper that needs attention. I have learned to tell the difference by watching patterns over time.

The Common Reasons I See Every Week

The most common cause I see is simple tear buildup. Dogs produce tears just like we do, and those tears can dry into a sticky discharge near the corners of the eyes. I probably wipe away minor eye gunk from at least three dogs on any given busy weekend. It is usually soft, pale, and easy to clean.

Allergies come up a lot as well. Dust, pollen, or even a new cleaning product can trigger watery eyes that turn into goop over a few hours. I remember a spaniel that stayed with me for five days and developed mild discharge after playing outside every afternoon. Once the exposure stopped, the problem faded.

Hair irritation is another one that people miss. Dogs with long facial hair often have strands brushing against their eyes, which leads to constant watering. I have trimmed eye-area fur for more than 20 dogs over the past year just to reduce that irritation. It does not fix everything, but it helps.

When It Starts Looking Like More Than Just Dirt

Not all eye discharge is equal. Color and texture matter. Thick, yellow, or green discharge usually points toward an infection rather than simple tearing, and I treat that as a red flag every time I see it.

If I am unsure, I sometimes cross-check symptoms with reliable sources or even suggest that owners review something like “why is my dog’s eye goopy” to get a clearer idea of what might be going on before deciding on the next step. That extra bit of context helps people avoid guessing. It also prevents delays in getting proper care.

One case last winter stuck with me. A bulldog came in with heavy, sticky discharge in one eye, and within a day, the eye looked slightly swollen. That was not something I tried to manage on my own. The owner took him to a vet, and it turned out to be an infection that needed medication.

Sometimes it is not an infection but a blocked tear duct. I have seen this more often in smaller breeds, especially those with flat faces. The tears have nowhere to drain, so they collect, creating a constant wetness that builds. It can look messy, but it is different from an infection if there is no redness or pain.

Dog’s Eye Goopy

How I Handle It Day to Day

I keep things simple unless there is a clear sign of trouble. A clean, damp cloth is usually enough for mild discharge. I gently wipe from the inner corner outward, and I always use a fresh section of cloth for each eye. Cross-contamination is real.

Routine matters. Some dogs need their eyes cleaned morning and evening, which quickly adds up, but keeps things under control without going beyond simple cleaning.

I avoid using random solutions or drops unless a vet has recommended them. I have seen owners try home remedies that ended up irritating the eye even more. Plain cleaning is often safer than experimenting.

Here is the quick check I run in my head before deciding what to do:

– Is the discharge clear or colored

– Is the eye red or swollen

– Is the dog rubbing or pawing at it

– Has this been happening for more than two days

If two or more of those raise concern, I suggest a vet visit. It keeps things from getting worse.

Situations That Need Immediate Attention

Some signs are hard to ignore. If a dog is squinting, avoiding light, or keeping one eye closed, I do not wait. That usually points to pain or irritation that goes beyond surface-level issues.

I once had a young mixed breed who started pawing at his eye repeatedly within a few hours of arrival. By evening, the eye was red and heavily tearing. The owner picked him up early, and it turned out there was a small scratch on the eye surface. That kind of injury needs quick care.

Sudden changes worry me more than slow ones. A dog with mild tear stains for months is less concerning than one that develops thick discharge overnight. Speed matters here. Fast changes often mean something new is happening.

Odor is another clue. Normal tear buildup doesn’t smell much, but infected discharge can have a noticeable scent. It is subtle, but once you recognize it, you do not forget.

What Owners Can Do Without Overthinking It

Most cases do not require panic. Many dogs will have minor eye discharge at some point, especially after sleep or outdoor play. I tell owners to observe first, rather than react immediately.

Keep the area clean. Trim hair if needed. Watch for patterns. Those three habits cover more ground than people expect. I have seen small issues stay small simply because someone paid attention early.

Diet sometimes comes up in conversations, though the connection is not always clear. Some owners swear that switching to a different food reduced tear staining. I have seen mixed results, so I treat that as a possible factor rather than a guaranteed fix.

Consistency beats overreaction. That is the approach I stick with. A calm routine often tells you more than a rushed decision.

I used to overlook mild eye discharge early in my work. Now, I see it as a signal: most of the time it’s simple, but it’s important to act before it becomes serious.

Are French Bulldogs Good Dogs
Apr
Are French Bulldogs Good Dogs From My Grooming Table Perspective

I run a small dog grooming studio out of a converted garage and see a steady stream of French Bulldogs every week. Their baths, nail trims, and fur cleaning have given me a clear, honest perspective on whether they’re genuinely good dogs or just a current trend. When owners ask, I always answer truthfully based on firsthand experience, not breed reputation.

What French Bulldogs Are Like Day to Day

French Bulldogs are easy to recognize by their upright ears and compact bodies, and their personalities show up fast. Most are social, not overly energetic, and manageable in a grooming setting that can stress some dogs.

I usually book 6 to 8 dogs a day. When one is a Frenchie, I know I will not be dealing with endless bouncing or high anxiety pacing like with some herding breeds. They tend to stay close to the table and seek attention, making handling easier, especially for new groomers.

That said, they can be stubborn. I have had a few that planted their feet and refused to move during a nail trim, which turns a quick task into a slow negotiation. It is not aggression most of the time; it is just a quiet refusal. That personality trait shows up in daily life too, not just on my table.

Health Realities I See Up Close

When discussing French Bulldogs, an important takeaway is that their unique appearance comes with health trade-offs that are clear during grooming. Owners should be prepared for the extra care their features require.

I once had a client who told me she researched extensively before getting her dog and mentioned using “Are French bulldogs good dogs?” as part of her decision-making process, yet she still felt unprepared for how much maintenance the breed requires. That conversation stuck with me because it comes up more often than people admit. Owners read about the breed but do not always picture the day-to-day care.

Breathing is the first thing I notice. Some Frenchies breathe loudly even at rest, and if the room warms or the dryer runs long, I pause to give them a break. I keep my grooming area around 22 degrees Celsius for the comfort of brachycephalic dogs.

Their folds trap moisture, and if not cleaned regularly, this can quickly turn into irritation or infection. Owners who stay consistent avoid most problems, but it takes discipline.

Temperament With People and Other Dogs

French Bulldogs are generally people-focused. I see that every day. When they come in, many look straight at me and expect interaction, unlike breeds that tend to stay more reserved.

They usually do well with strangers, which helps in grooming, boarding, and vet visits. I rarely deal with fear biting from a Frenchie. That is not a guarantee, though. Any dog can react under stress, especially if they are in pain or overwhelmed.

With other dogs, it is mixed. Some of them are playful and relaxed, while others act a bit bossy despite their small size. I once had two Frenchies booked back-to-back, and one was calm while the other tried to dominate every dog it saw through the glass door. Personality varies a lot in this breed.

Are French Bulldogs Good Dogs

Maintenance Is Higher Than People Expect

Many people assume French Bulldogs are low-maintenance because of their short coat. That is only partially true. They do not need haircuts, but they still need regular care in other areas.

I usually tell clients to focus on four things:

Skin folds, ears, nails, and weight quickly show neglect. I’ve seen dogs gain 3 to 5 kilograms in a year—extra weight strains joints and breathing.

Bathing is simple, but drying needs care. I avoid high heat and use a lower setting, with breaks. It takes longer, but keeps them comfortable.

They shed more than people think. It’s short hair, but constant. Owners notice it on furniture before the dog itself.

Cost Over Time Is Not Small

People usually focus on the purchase price, which is high for this breed, but they often underestimate ongoing costs like grooming and vet bills.

A typical grooming visit for a French Bulldog at my shop is not as expensive as for long-haired breeds, but it is still part of a regular schedule. Most of my clients come in every 4 to 6 weeks. That adds up over a year.

Vet care can be unpredictable. I have had clients mention surgeries, allergy treatments, and breathing-related procedures that cost several thousand dollars in their local currency. Not every dog will need that, but enough do that it is part of the reality of owning this breed.

Food matters too. Because they can easily gain weight, owners often switch to controlled diets or higher-quality food. That is another ongoing expense that people do not always plan for.

Who They Are Actually Good For

French Bulldogs can be great companions in the right home. I have seen them thrive with people who understand their limits and remain consistent in their care. They are especially suited for smaller living spaces because they do not need long runs or high-intensity exercise.

They do well with people who are home often. These dogs enjoy company. Those left alone for long hours are usually more anxious or restless during grooming.

Families with young kids can do well with them if boundaries are taught early. Their size makes them less intimidating than larger breeds, but they still need respect. I have seen a calm Frenchie snap when a child pulled too hard on its ear.

They are not ideal for someone wanting a low-effort dog. The care is steady, and skipping it leads to problems fast.

In conclusion, French Bulldogs offer personality and companionship but require regular, attentive care. If owners are prepared, the rewards can be significant—even from the grooming table perspective.

Teach Dogs to Lie Down
Apr
How I Teach Dogs to Lie Down in Real Training Session

I work as a home-based dog trainer who focuses on basic obedience for everyday families, and teaching a dog to lie down is one of the first things I cover. I have done this in small apartments, busy family homes, and even outdoor courtyards where distractions never stop. Over time, I have learned that this simple command is less about the position itself and more about communication between the dog and the owner. I do not rush it. I built it step by step.

Why “Lay Down” Matters More Than People Think

Most people come to me thinking “sit” is enough, but I usually explain that “lay down” changes a dog’s energy level in a way sitting never does. A dog that is lying down is less likely to jump, bark, or pull toward distractions. I have seen this shift happen in under 10 minutes with the right approach.

Last spring, I worked with a restless young Labrador. The dog could sit, but didn’t stay down. After calmly reinforcing the down position for 20 seconds, the dog’s mood quickly softened.

That is why I always teach this early. It becomes a reset button for the dog. It also helps with grooming, vet visits, and even feeding routines because the dog learns to pause rather than react.

How I Start the Training Process

I always begin with the dog in a quiet space, usually a room with minimal noise and no other pets around. Too many distractions slow things down, especially in the first 5 to 10 minutes. I keep treats small and soft so I can reward quickly without breaking the flow.

Some owners come to me after trying different online methods, and one mentioned using ” How do I teach my dog to lie down before booking a session, but the issue was not the method itself; it was timing and consistency. That happens a lot. The technique matters, but how you apply it matters more.

I start with the dog in a sit position. From there, I hold a treat close to the dog’s nose and slowly move it down toward the floor, then slightly forward. Most dogs will follow the treat with their head, and their body naturally lowers. When the elbows touch the ground, I reward immediately.

Timing is everything here. If I reward too early, the dog stays halfway down. If I wait too long, the dog gets confused or stands back up. I aim to reward within a second of the correct position.

Teach Dogs to Lie Down

What I Do When the Dog Refuses

Some dogs do not follow the treat easily. I see this in about 3 out of 10 sessions. These dogs either back up, stay stiff, or try to grab the treat without moving their body.

When that happens, I adjust the angle. Instead of moving the treat straight down, I bring it closer to the dog’s chest and then slowly forward along the ground. This creates a natural fold in their posture. It takes patience.

I remember working with a bulldog that refused to lower itself at all. He would sit and stare at me like he was waiting for a better offer. I spent nearly 12 minutes shaping the behavior, rewarding little progress like bending the elbows slightly, before he finally lay down fully. After that first success, the second attempt took under a minute.

This pattern is common: the first success is slow, but with repeated practice, dogs improve quickly. They learn by repetition, not explanation.

Building the Command After the Behavior

I do not say “down” right away. I wait until the dog is consistently following the motion. Usually, after 6 to 10 successful repetitions, I start adding the word.

I say “down” once, then guide the dog with the treat. Over time, the dog starts to connect the word with the action. If I say it too early, the word becomes meaningless noise.

Consistency matters. I tell owners to use the same word every time, because dogs respond to patterns, not changes in language.

I also keep sessions short. About 5 to 8 minutes is enough for one round. After that, I give the dog a break. Long sessions often lead to frustration, especially for younger dogs.

Making the Behavior Reliable in Real Life

Getting a dog to lie down in a quiet room is one thing. Getting the same behavior outside with noise, movement, and distractions is a different challenge. This is where most training falls apart.

I gradually increase the difficulty. First, I practice in another room. Then near a doorway. Then, outside, there are mild distractions. Each step builds on the last one.

I worked with a small mixed breed that could lie down perfectly at home but ignored the command outside. It took about 2 weeks of gradual exposure before the dog responded reliably in a park setting. Progress was not linear. Some days were better than others.

Rewards also change over time. At first, I used treats every time. Later, I switched to random rewards. Sometimes it is a treat, sometimes praise, sometimes a short play moment. This keeps the dog engaged without depending on food every single time.

Common Mistakes I See From Owners

I see patterns in mistakes, and they show up in almost every training session. One of the biggest is repeating the command too many times. Saying “down, down, down” does not help. It actually teaches the dog to ignore the first few attempts.

Another issue is poor timing. Owners often reward the dog after it stands back up, which reinforces the wrong behavior. I always tell them to watch the dog’s elbows. That is the moment to reward.

Some people push the dog physically into position. I avoid that. It can create resistance or discomfort, especially in older dogs or breeds with joint issues. I prefer guiding and rewarding instead of forcing.

Consistency at home is the biggest factor. I might work with a dog for an hour, but the owner’s daily practice shapes the long-term result. Remember, even 5 minutes a day can make a difference—regular, short practice is key.

Teaching this command shows how a dog learns and how an owner communicates. The key takeaway: lasting progress comes from patient, consistent teamwork. The calm connection that follows is rewarding for both dog and owner.

Balloon Poodle Dog Step by Step
Apr
How I Twist a Balloon Poodle Dog Step by Step

I work as a mobile event entertainer at small birthday parties and community fairs, and I have been making balloon animals for years while moving between tables and noisy backyards. The balloon poodle dog is one of the first shapes I learned properly because kids always ask for it. I have made thousands of them in all kinds of settings, from tight indoor living rooms to windy park shelters. Over time, I learned that technique matters less than rhythm and consistency.

Getting the Right Balloon and Setup

The first thing I always pay attention to is the balloon itself. I usually work with 260 modeling balloons because they hold shape well without being too stiff to twist. I keep a small pump clipped to my belt so I can refill quickly between requests, especially at events where I might make 40 to 60 balloons in an afternoon.

Beginners often overinflate the balloon, which causes it to pop. Leave a soft tail about four finger widths at the end to give air space to move as you twist. This step is key to smooth twisting and preventing pops.

Before twisting, always stretch the balloon. Stretching reduces internal pressure and helps avoid sudden bursts. This quick step prevents many common problems.

Building the Basic Poodle Shape

To begin the poodle, twist a two-inch bubble for the nose, then two smaller equal bubbles for the ears, and lock them together. Take care to keep the ear bubbles the same size for the classic poodle look.

At one outdoor event last spring, I was set up beside a snack stall when a parent asked me how I managed to keep my shape consistent while working quickly. I told her it is all about locking twists properly and not rushing the middle section, and I showed her how to make a balloon poodle dog as a reference point when teaching new assistants during busy days. I usually demonstrate slowly first, then speed up once they see the pattern. It makes more sense when you watch the structure being built step by step.

After the head, I form the front legs by twisting two equal segments and locking them into the neck area. This part needs firm hands, but not too much pressure, or the balloon weakens. I always pause for a second here to check symmetry before moving on.

Balloon Poodle Dog Step by Step

Shaping the Body and Back Legs

Twist the body section slightly longer than the front legs. This length helps the poodle stand upright and look well-balanced.

After the body, twist the back legs slightly thicker than the front. This adds stability and improves how the balloon stands when done.

Once the back legs are twisted, I secure everything by looping the remaining balloon into a tail. That tail is what completes the silhouette. I sometimes curl it slightly for effect, but most kids are just happy it looks like a dog.

Common Mistakes I See and Fix

Avoid twisting too tightly. High internal pressure can cause the balloon to pop with just a small extra twist. Keep your twists firm but not excessive.

Another issue is the uneven sizing of the ear bubbles. If one ear is bigger, the whole head looks tilted. I usually correct this by gently redistributing air before locking the twist, which is easier than starting over.

Never skip the initial stretching step. Taking a few seconds to stretch the balloon prevents future twisting issues and popping.

How I Practice and Improve Speed

When I am not working events, I sometimes practice while watching television or sitting outside in the evening. I keep a small bundle of balloons in my van, and I will run through basic shapes like the poodle until my hands move without thinking. That repetition matters more than raw talent.

I track my speed loosely by how many I can make before a balloon batch runs low. On a good day, I can twist a simple poodle in under two minutes without rushing or compromising shape. That consistency helps when I am dealing with long lines of impatient kids.

I also teach newer helpers by letting them copy my movements slowly first. I do not correct everything at once. I let them feel the tension of the balloon so they understand how much pressure is safe. That approach usually clicks faster than giving long instructions.

The balloon poodle looks simple, but it teaches control, timing, and patience in a way most people do not expect. I still refine small details every time I make one, even after years of doing it. The shape never really becomes automatic in the way people assume it should, and that is part of what keeps it interesting for me.

Is Campanula Toxic to Dogs
Apr
Is Campanula Toxic to Dogs and What I’ve Seen in Real Homes

Everything You Need to Know

I’m a mobile dog groomer based in Florida, and I spend most of my week moving between homes where dogs are part of the family and the garden is just as important as the living room. Over time, I’ve had more conversations than I can count about plants in yards and what dogs tend to chew on when no one is watching closely. Campanula comes up more often than people expect because it shows up in flower beds and hanging pots that dogs can easily reach. I’ve learned to connect what I see in grooming visits with what dogs are exposed to at home.

Most owners don’t realize how often dogs interact with plants while roaming outside or even sniffing around indoor arrangements. A customer last spring called me worried because her small terrier had been chewing on a plant she couldn’t identify in her backyard, which was later confirmed as campanula. The dog was acting a little off, mostly mild stomach upset, and she was anxious it might be something more serious. Situations like that pushed me to pay closer attention to which plants are most common in pet households.

From my experience working around pets every day, I’ve seen that plant curiosity is normal behavior, especially in younger dogs or those left unsupervised for short periods. I don’t give medical diagnoses, but I do help owners connect patterns between exposure and symptoms so they know when to involve a vet. Campanula isn’t one of those plants that cause panic reactions in every case I’ve seen, but it still warrants serious concern. That middle ground is where most confusion happens.

What I notice about dogs and plant chewing

In grooming settings and home visits, I’ve watched dogs interact with anything green within reach, especially during downtime when they’re curious or bored. Some dogs will nibble leaves lightly and move on, while others will chew more aggressively if the texture interests them. Campanula, with its soft leaves and bell-shaped flowers, tends to attract that kind of exploratory behavior. I’ve mostly seen it in gardens where plants hang low or spill from containers.

The reaction after chewing varies widely, and that’s what makes owners unsure how to respond. Some dogs show no change at all, while others might have mild digestive upset, such as drooling or a brief loss of appetite. I remember a case where a medium-sized mixed breed chewed on garden plants during an evening outing and seemed fine afterward, aside from slightly loose stool the next morning. The owner had no idea campanula was even part of the garden mix until we went through the yard together.

In my day-to-day work, I’ve learned that the context matters more than the plant name alone. A dog that eats a small amount once may react differently from one that repeatedly grazes on garden foliage. I also consider environmental stress, heat, and dietary changes, as these factors can mimic or worsen mild symptoms. That’s why I always ask owners for the full picture rather than focusing on a single plant exposure.

Is Campanula Toxic to Dogs

How do I explain campanula concerns to dog owners

Campanula is commonly listed as having low to mild toxicity for dogs, which means it is not typically associated with severe poisoning in small exposures. That said, low toxicity doesn’t mean zero reaction, especially for sensitive dogs or those that ingest larger amounts. I’ve had conversations with owners who were surprised that even ornamental plants can cause mild stomach upset if eaten. It’s usually less about danger and more about prevention and observation.

When owners want clarity on plant safety, I often suggest they speak with local veterinary professionals who can evaluate symptoms and exposure history. A nearby clinic I sometimes refer to for follow-up guidance is Campanula, which is toxic to dogs, since they’re familiar with both emergency and routine digestive cases. I’ve had clients visit them after uncertain plant exposure situations just to rule out anything serious. Most of the time, reassurance and monitoring are all that’s needed after a mild incident.

What I’ve noticed is that panic often comes from not knowing the plant’s name rather than from the severity of the symptoms. Once owners identify campanula, they usually feel more grounded about the next steps. I always remind them to look for changes like repeated vomiting, lethargy, or refusal to eat, since those signs matter more than the plant itself. Without those symptoms, most dogs I’ve encountered recover quickly on their own.

There was a customer a while back who kept several flowering plants on a patio, including campanula mixed with other ornamentals. Her dog occasionally nibbled around the pots, and she was worried each time she noticed it. After tracking a few episodes and observing the dog’s behavior, it became clear that the reactions were mild and short-lived, mostly just temporary stomach discomfort. That experience helped her focus more on prevention, like moving plants higher rather than constantly worrying.

What I recommend based on real exposure cases

From what I’ve seen in the field, prevention is more effective than trying to react after ingestion. Dogs that are bored, unsupervised, or left around accessible plants are far more likely to sample whatever is nearby. I usually suggest simple changes, such as raising pots, blocking garden access, or redirecting chewing behavior with safe toys. These small adjustments often significantly reduce plant-related incidents.

I also pay attention to repeated behavior because that tells me more than a one-time incident. If a dog keeps going back to the same plant, even one considered low toxicity like campanula, I treat it as a training or environmental issue rather than just a dietary accident. That shift in thinking helps owners take action rather than wait for symptoms to recur. Consistency matters more than intensity in most of these cases.

Another thing I’ve noticed is that dogs with sensitive stomachs or dietary issues tend to react more noticeably to even small plant exposures. I’ve seen cases where mild chewing led to temporary discomfort, while other dogs showed no reaction to similar exposure. That variation is why I avoid giving one-size-fits-all reassurance. Each dog’s history plays a role in how they respond.

After years of seeing these situations unfold in different homes, I’ve become careful about how I frame plant concerns. Campanula doesn’t usually trigger severe toxicity in dogs based on what I’ve seen and what most veterinary references suggest, but it still belongs in the category of plants worth managing thoughtfully. Most issues I’ve encountered were mild, temporary, and preventable with a few environmental changes. That balance between awareness and calm response is what I try to leave every owner with after a visit.

Giving Tylenol to Dogs
Apr
What I’ve Learned About Giving Tylenol to Dogs the Hard Way

I run a small boarding and daycare setup behind my house. Many owners try to manage their dog’s pain at home, often reaching for Tylenol because it’s familiar. I once thought a small dose was harmless until I saw firsthand how dangerous a wrong dose can be. That now shapes every conversation I have about it.

Why People Even Consider Tylenol for Dogs

Owners often ask if Tylenol is safe for dogs. When dogs limp after a long walk or seem sore, people reach for medicine they already trust. Because Tylenol is familiar, it’s easy to assume it’s safe for dogs—but this assumption can be very dangerous.

While a vet may prescribe an exact dose of acetaminophen for specific circumstances, this is rare and very carefully calculated based on the dog’s size, condition, and medical history. No two dogs get the same instructions, which shows how dangerous guessing can be. Even a small dosing mistake is risky.

I remember a regular client who gave her older dog a small piece of a tablet after noticing stiffness in the back legs. She meant well. Within hours, the dog became lethargic and stopped eating, which pushed her to call the vet in a panic. That situation could have gone much worse.

How Tylenol Affects a Dog’s Body

Tylenol, or acetaminophen, is processed differently in dogs than in humans. Their liver handles it in a way that can produce harmful byproducts if the dose is off by even a small margin. I have heard vets say the safety margin is narrower than for other dog medications. That makes casual use dangerous.

If someone wants a clear explanation beyond what I can share from experience, I usually suggest reading something like Is Tylenol Toxic for Dogs? ” because it breaks down the risks in plain language. It helps owners see that this is not a minor concern or an overreaction. The science behind it is not complicated, but it is serious.

What worries me most is how quickly symptoms of poisoning appear in dogs. I have seen dogs show signs on the same day, especially in smaller breeds under 10 kilograms. Larger dogs might take a bit longer, but the outcome depends on how much Tylenol was given and how fast treatment starts. Every minute counts when exposure happens.

Signs I Watch for After Accidental Exposure

I am not a vet, but I know what to look for after seeing it several times. Lethargy is usually the first sign, followed by a lack of appetite and sometimes vomiting. The gums can look pale or even slightly bluish, which always sets off alarms for me. That is when I tell owners to stop waiting and act.

Some dogs develop mild facial or paw swelling. After one owner admitted to dosing before drop-off, we noticed minor muzzle swelling overnight—so we called the vet.

These signs do not always appear together. That makes it tricky. A dog might only show one or two symptoms at first, leading someone to underestimate the seriousness of the situation.

Giving Tylenol to Dogs

What I Tell Owners to Do Instead

My advice is straightforward: if your dog is in pain, pick up the phone and call a vet now. Don’t second-guess the situation. Taking immediate action can prevent serious harm and ensure your dog receives the right care. There are safer pain management options specifically made for dogs, and they come with proper dosing instructions. I have seen vets prescribe alternatives that work well without the same level of risk tied to acetaminophen. Owners sometimes hesitate because of cost, but the difference is worth it.

If a dog is showing any symptoms, act fast—do not wait. Delaying can turn a treatable problem into an emergency. Call your vet immediately; early action can save your dog’s life and avoid greater cost and distress. Why I Take This Seriously in My Own Work

I keep a close eye on every dog in my care, especially during the first 24 hours of boarding. That window is when hidden issues often show up, including reactions to something given at home. I ask direct questions during drop-off, including whether the dog has received any medication in the past 24 hours. Some owners forget to mention it unless prompted.

One case stands out: a medium dog arrived quieter than usual. The owner mentioned giving Tylenol the night before. That detail changed our monitoring and prompted us to involve the vet immediately. Making a habit of asking questions and staying alert matters. If you suspect a dog has had Tylenol, don’t wait for more signs to appear—take responsibility and reach out to your vet right away. Those small decisions can protect lives. I do not keep Tylenol anywhere near the dogs I care for. That choice came from experience, not theory.

Clean Paw Prints From Dogs
Apr
How I Capture Clean Paw Prints From Dogs Without the Mess

I run a small pet grooming studio in a converted garage and make paw prints for clients more often than you might think. Some want a keepsake, others a memorial, and a few just like the look on their wall. I’ve done this for tiny puppies, heavy retrievers, and squirmy dogs. Over time, I learned that getting a clean paw print is mostly about preparation.

Choosing the Right Materials Before You Start

I have tried almost every method, from basic ink pads to air-dry clay kits, and each has its place depending on what you want to keep. Ink works well for paper prints that you plan to frame, while clay is better if you want something you can hold and keep long-term. I usually keep three options ready in my workspace because different dogs react differently to textures and surfaces. Having backup materials saves a lot of frustration.

For ink prints, I use non-toxic, pet-safe ink and thick paper that does not wrinkle under pressure. Thin paper folds too easily, especially with larger dogs that put more weight on their paws. With clay, I roll it out to about half an inch thick, which gives enough depth to capture detail without cracking later. That thickness works for most breeds I see in a typical week.

I remember a client who brought in an energetic spaniel, and we went through two sheets of paper before switching to clay. The dog kept lifting its paw too quickly, leaving smudged prints that looked more like blobs than prints. Once we changed the material, the pad lines were clearly visible. That experience stuck with me.

Preparing the Dog So the Print Comes Out Clean

The dog matters more than the tools. If the paw is dirty, wet, or tense, the print will show it. I always clean the paw first with a damp cloth, then dry it fully, paying attention to the fur between the pads, as moisture there can blur the edges. This step takes less than 2 minutes but makes a visible difference.

When owners ask me how to practice at home, I sometimes point them to a simple walkthrough, like how to make a paw print of your dog, because it mirrors the same calm setup I use in my shop. It helps them understand that the dog’s comfort matters just as much as the materials they pick. A relaxed dog gives a better print, every time.

I also pay attention to timing. After a walk, it is usually a bad idea since paws may be rough or slightly swollen. I prefer doing it when the dog has been resting for at least 20 minutes, which keeps them calmer and less reactive. Quiet dogs help a lot.

Clean Paw Prints From Dogs

The Actual Pressing Technique I Use

I gently position the paw. With my fingers, I apply even pressure from above, making sure not to press too hard or too lightly. I hold the paw for about two seconds, then lift it straight up for a clear print.

With ink, I make sure the entire pad surface touches the paper in one motion. If the dog shifts midway, I do not try to fix it. I start over. Trying to correct a half-print usually creates a mess that cannot be salvaged. Clean attempts beat rushed ones.

Clay gives a little more flexibility. If a print is off, I can smooth the clay and try again before it sets. I allow up to three attempts before the clay loses texture quality. The window is short, so I stay focused.

Handling Difficult or Nervous Dogs

Some dogs dislike having their paws handled. I work slowly, letting them sniff materials before starting. Rushing a nervous dog leads to poor prints and stress.

For very active dogs, I sometimes ask the owner to gently hold them while I guide the paw. A familiar person helps keep the dog grounded. I’ve also used treats as a distraction, placing one just out of reach so the dog looks forward while I work. Our first attempt. We paused, gave it a few minutes, and tried again with a calmer approach. The second try worked. Patience pays off.

Drying, Storing, and Preserving the Print

After printing, I set it aside to dry undisturbed. Ink usually dries in 10 to 15 minutes, while clay takes about a day or more. Waiting prevents any accidental smudging or loss of detail.

Once dry, I store the print flat, away from sunlight and heat, which can damage it. For long-term protection, I recommend using a simple frame or a box to keep dust and moisture out.

One client framed a set of prints from three dogs, taken about a year apart. Seeing them together showed how much the youngest had grown. Small details like these make the prints meaningful over time. In it hundreds of times. Each one feels a little different, depending on the dog and the moment, and that keeps the process from feeling routine.

Measure a Dog’s Length
Apr
How I Measure a Dog’s Length Without Guesswork

I run a mobile grooming van and spend a lot of time fitting dogs for coats, crates, and trims. Measuring a dog’s length seems simple, but owners often misjudge it by a few inches, ruining the fit. Accuracy matters more than speed. Over time, I developed a routine that works for all dogs.

Where Length Actually Starts and Ends

I tell clients that dog length is not nose to tail. That mistake is common, especially with first-time owners buying coats. I measure from the neck’s base, where the collar sits, to the tail’s base, where it joins the body. This delivers a consistent, reliable number across breeds and body types.

A customer last spring brought in a mixed breed that measured 5 inches longer nose-to-tail than by the standard method. The coat she bought dragged on the ground. Once we remeasured the collar to the tail base, the correct size fit cleanly. Small differences matter.

There is one exception I mentioned to experienced handlers. For certain working dogs with docked tails or unusual body shapes, I may adjust the endpoint slightly to match how a garment will sit on them. Still, I keep the base method consistent to avoid confusion later. Consistency saves time.

My Step-by-Step Method in Real Settings

I usually measure dogs on a flat, non-slip surface. A rubber mat helps keep their stance steady. If the dog shifts or crouches, the measurement can change by an inch or two. I keep one hand lightly on the shoulder to keep them relaxed.

If you want a quick reference or visual aid, I sometimes point people toward a simple resource, like how to measure a dog’s length, because it shows the same collar-to-tail approach I use in practice. I do not rely on charts alone, but they help owners understand what I am doing. That shared understanding cuts down on mistakes when they measure at home later. It also builds confidence.

I use a flexible measuring tape, not hard rulers, which don’t follow a dog’s curve. I place the tape at the collar, run it along the spine, and stop at the tail base. I read the number twice and write it down.

Sometimes the dog will move mid-measure. It happens a lot. In those cases, I reset and do it again rather than averaging a guess. I have learned that taking an extra 30 seconds now prevents a bad fit later that could cost much more time to fix.

Measure a Dog’s Length

Common Mistakes I See Every Week

The most common issue is measuring while the dog is sitting. A sitting posture shortens the back and can throw off the number by 2 to 4 inches, depending on the breed. I always ask owners to have the dog stand naturally, with all four paws on the ground. No stretching, no forcing a pose.

Pulling the tape too tight is another mistake. The tape should rest lightly. Thick coats can lose nearly an inch if pressed down, while loose tape adds length. Balance comes with practice.

I also see confusion around tail position. Some owners try to follow the tail upward, especially with curled breeds. That adds unnecessary length. The correct endpoint is always the base, where the tail meets the body, regardless of how the tail sits. Simple rule. Stick to it.

Adjusting for Different Breeds and Body Types

Not all dogs carry their length the same. A Greyhound’s long back measures differently from a Bulldog’s, even with similar numbers. Numbers are a starting point, not the full story.

With long-bodied breeds like Dachshunds, I let the tape follow the back’s curve. It adds about half an inch, usually improving fit. Small changes make a visible difference.

For double-coated dogs, I part the fur at the start to find the collar base. Otherwise, measurement can drift forward. These small adjustments come with experience.

Why Accurate Length Matters More Than People Think

I have seen poor fits cause problems. Too-long coats restrict movement and collect debris. Too-short crates make travel uncomfortable, especially on long trips. These issues are common.

One client came in with a working dog that refused to wear a jacket. The dog would freeze in place every time the coat went on. After proper measurement, we realized the coat was nearly 3 inches too short, causing it to pull at the shoulders. Once replaced with the correct length, the dog moved normally again. Behavior can change with fit.

Good measurement saves money. Returns, replacements, and wasted purchases add up. Careful measuring prevents those headaches.

I measure every dog to guarantee a proper fit, even if an owner brings their own measurement. Consistent, accurate measuring is the main reason clients trust and return to my service.