
How I Capture Clean Paw Prints From Dogs Without the Mess
I run a small pet grooming studio in a converted garage and make paw prints for clients more often than you might think. Some want a keepsake, others a memorial, and a few just like the look on their wall. I’ve done this for tiny puppies, heavy retrievers, and squirmy dogs. Over time, I learned that getting a clean paw print is mostly about preparation.
Choosing the Right Materials Before You Start
I have tried almost every method, from basic ink pads to air-dry clay kits, and each has its place depending on what you want to keep. Ink works well for paper prints that you plan to frame, while clay is better if you want something you can hold and keep long-term. I usually keep three options ready in my workspace because different dogs react differently to textures and surfaces. Having backup materials saves a lot of frustration.
For ink prints, I use non-toxic, pet-safe ink and thick paper that does not wrinkle under pressure. Thin paper folds too easily, especially with larger dogs that put more weight on their paws. With clay, I roll it out to about half an inch thick, which gives enough depth to capture detail without cracking later. That thickness works for most breeds I see in a typical week.
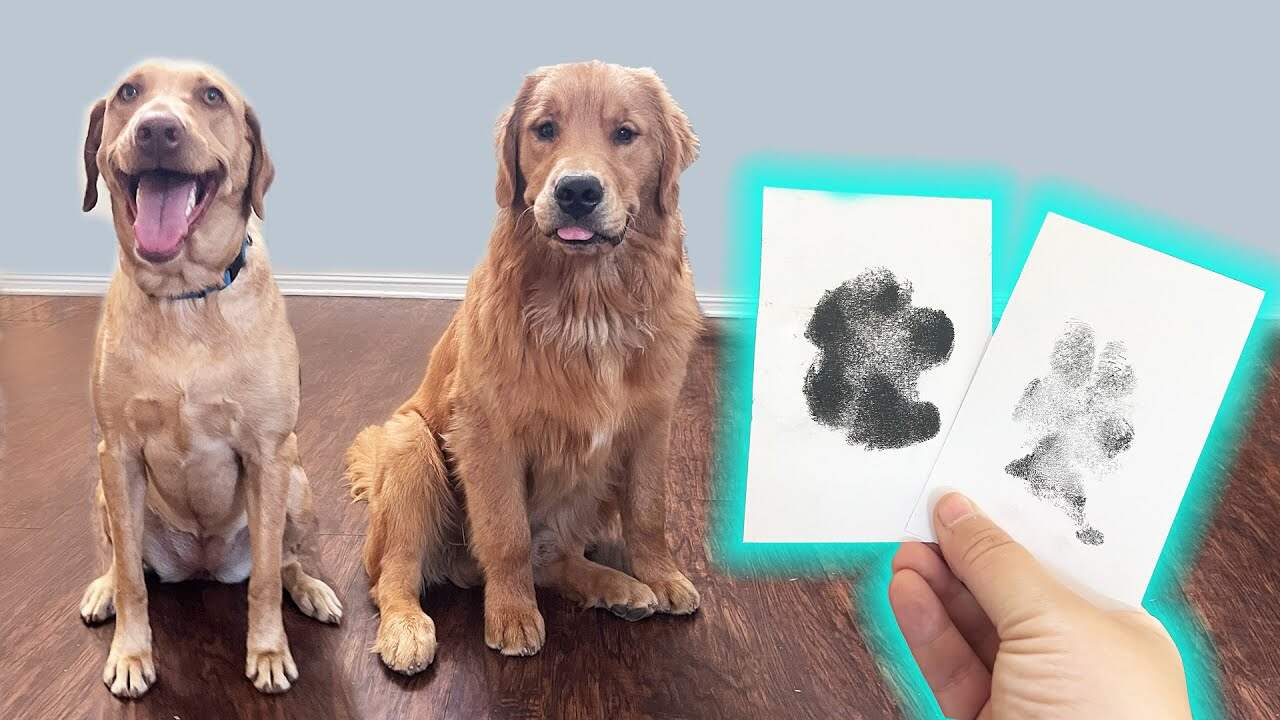
I remember a client who brought in an energetic spaniel, and we went through two sheets of paper before switching to clay. The dog kept lifting its paw too quickly, leaving smudged prints that looked more like blobs than prints. Once we changed the material, the pad lines were clearly visible. That experience stuck with me.
Preparing the Dog So the Print Comes Out Clean
The dog matters more than the tools. If the paw is dirty, wet, or tense, the print will show it. I always clean the paw first with a damp cloth, then dry it fully, paying attention to the fur between the pads, as moisture there can blur the edges. This step takes less than 2 minutes but makes a visible difference.
When owners ask me how to practice at home, I sometimes point them to a simple walkthrough, like how to make a paw print of your dog, because it mirrors the same calm setup I use in my shop. It helps them understand that the dog’s comfort matters just as much as the materials they pick. A relaxed dog gives a better print, every time.
I also pay attention to timing. After a walk, it is usually a bad idea since paws may be rough or slightly swollen. I prefer doing it when the dog has been resting for at least 20 minutes, which keeps them calmer and less reactive. Quiet dogs help a lot.
The Actual Pressing Technique I Use
I gently position the paw. With my fingers, I apply even pressure from above, making sure not to press too hard or too lightly. I hold the paw for about two seconds, then lift it straight up for a clear print.
With ink, I make sure the entire pad surface touches the paper in one motion. If the dog shifts midway, I do not try to fix it. I start over. Trying to correct a half-print usually creates a mess that cannot be salvaged. Clean attempts beat rushed ones.
Clay gives a little more flexibility. If a print is off, I can smooth the clay and try again before it sets. I allow up to three attempts before the clay loses texture quality. The window is short, so I stay focused.
Handling Difficult or Nervous Dogs
Some dogs dislike having their paws handled. I work slowly, letting them sniff materials before starting. Rushing a nervous dog leads to poor prints and stress.
For very active dogs, I sometimes ask the owner to gently hold them while I guide the paw. A familiar person helps keep the dog grounded. I’ve also used treats as a distraction, placing one just out of reach so the dog looks forward while I work. Our first attempt. We paused, gave it a few minutes, and tried again with a calmer approach. The second try worked. Patience pays off.
Drying, Storing, and Preserving the Print
After printing, I set it aside to dry undisturbed. Ink usually dries in 10 to 15 minutes, while clay takes about a day or more. Waiting prevents any accidental smudging or loss of detail.
Once dry, I store the print flat, away from sunlight and heat, which can damage it. For long-term protection, I recommend using a simple frame or a box to keep dust and moisture out.
One client framed a set of prints from three dogs, taken about a year apart. Seeing them together showed how much the youngest had grown. Small details like these make the prints meaningful over time. In it hundreds of times. Each one feels a little different, depending on the dog and the moment, and that keeps the process from feeling routine.