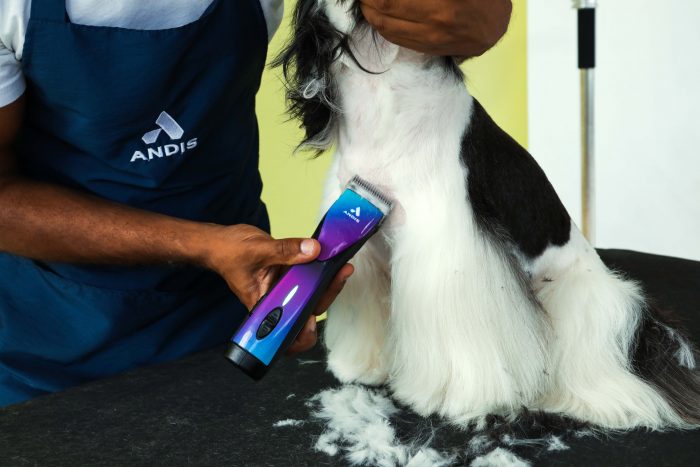
How I Sharpen Dog Hair Clippers (After Ruining a Blade Early in My Career)
Everything You Need to Know
I’ve been grooming dogs professionally for a little over a decade now, and if there’s one maintenance skill that separates a smooth workday from a frustrating one, it’s keeping your clipper blades sharp. I learned that the hard way.
Early on, I kept pushing through a dull blade on a nervous spaniel. The clipper started snagging, the dog got anxious, and I ended up with an uneven coat that took twice as long to fix. That was the day I stopped treating blade care as optional.
If your clippers are pulling hair, leaving lines, or heating up too quickly, sharpening isn’t just about better results—it’s about safety and comfort for the dog.
First, Know When a Blade Actually Needs Sharpening
A lot of people jump straight to sharpening when the issue is something simpler. In my shop, I always rule out the basics first.
Dirty blades are the biggest culprit. Hair, dander, and oil buildup can make even a sharp blade feel dull. I’ve had clients bring in clippers they thought were ruined, and after a proper cleaning and oiling, they cut like new.
Another common issue is misalignment. If the top and bottom blades aren’t sitting correctly, you’ll get poor cutting performance no matter how sharp they are.
Once I’ve cleaned, oiled, and aligned the blade—and it’s still dragging—that’s when sharpening makes sense.
The Way I Actually Sharpen Blades
There are a few ways to do this, but I’m going to be honest: after years in grooming, I don’t recommend that most pet owners try full sharpening from scratch. I do it myself because I’ve invested in the tools and have already made the mistakes.
That said, here’s how I handle it in my workspace.
What I Use
- A flat sharpening surface (lapping plate or whetstone)
- Blade wash solution
- Clipper oil
- A magnet or blade holder (for safety and control)
My Process
I start by fully removing the blade from the clipper and taking it apart. That’s something I was hesitant to do in my early days, but once you understand how the pieces fit, it becomes routine.
I clean everything thoroughly first. There’s no point sharpening over dirt—it just grinds debris into the metal.
Then I move to the sharpening surface. I keep the blade flat—this is critical. The first time I tried sharpening, I tilted it slightly without realizing. That tiny angle change made the blade worse than before. It wouldn’t cut cleanly at all.
Now I keep steady, even pressure, and move the blade in smooth strokes across the surface. Not aggressive, not rushed. Let the abrasive do the work.
Once both the cutter and comb are evenly honed, I clean them again, reassemble the blade, oil it, and test it on a practice patch or a thick coat.
A Mistake I Still See All the Time
Last spring, a client tried sharpening their clippers with sandpaper taped to a table. The blade was scratched and uneven, and it dragged instead of cutting cleanly.
That’s the risk with DIY shortcuts. Uneven sharpening doesn’t just reduce performance—it can make the blade unsafe.
If you don’t have a perfectly flat surface, you’re not really sharpening—you’re reshaping the blade unpredictably.
When I Send Blades Out Instead
Even after years of doing this, I still send my blades to a professional sharpening service regularly.
Why? Because they use precision equipment that restores the factory edge. When you’re grooming multiple dogs a day as I do, that level of sharpness makes a noticeable difference.
I usually rotate blades—using one set while another is out for sharpening. It keeps my workflow smooth and prevents overusing a single blade.
If you’re a pet owner grooming at home, sending your blade out every few months (depending on use) is often the smarter move.
Heat and Friction: The Overlooked Problem
One thing newer groomers don’t expect is how quickly dull blades heat up. I’ve had moments where I touched a blade mid-groom and immediately pulled my hand back.
Heat builds from friction, and dull edges create more resistance. That’s uncomfortable at best and risky at worst for the dog’s skin.
Sharp blades cut cleanly with less effort, which keeps temperatures down. That alone is reason enough to stay on top of maintenance.
My Honest Advice After Years of Doing This
If you’re occasionally grooming your own dog, focus more on cleaning and oiling than on sharpening. You’ll solve most performance issues that way.
If you’re determined to sharpen blades yourself, invest in proper tools and practice on an old blade first. Not your good one.
And if you ever feel unsure, send it out. I still do, even after all these years.
A sharp blade doesn’t just make your job easier—it changes how the dog experiences the entire grooming session. And once you’ve seen the difference firsthand, it’s hard to go back.