Worms in Dog Poop
Mar
Understanding Worms in Dog Poop: A Pet Owner’s Guide

From a Vet Who Sees This Weekly

The first time a client brought me a stool sample wrapped in a tissue and said, “Something’s moving in it,” I remember the mix of concern and embarrassment on their face. I’ve been a small-animal veterinarian for over a decade. This is one of the most common (and fixable) issues dog owners face.

If you’ve noticed something unusual in your dog’s poop, you’re not alone. The tricky part is knowing what you’re actually looking at. Not all worms look the same, and not everything that looks like a worm actually is one.

Let me walk you through what I’ve seen in real cases and what it likely means.

The Most Common Worms You’ll Actually See

In my experience, dog owners usually spot worms when they’re already visible to the naked eye. That narrows it down to a few usual suspects.

Roundworms are probably the most recognizable. They look a bit like pale, off-white spaghetti strands. I once had a young dog come in after vomiting, and several of these long, noodle-like worms were mixed in. The owner initially thought it was undigested food. In stool, they appear similar: long, smooth, and sometimes curled.

Tapeworms are different. You won’t usually see a full worm. Instead, you’ll notice small, rice-like segments around the poop or stuck to your dog’s rear. I had a case last spring in which a client insisted their dog had “grains of rice” on the bedding. That’s classic tapeworm shedding. These segments can move slightly when fresh. It’s understandable that this freaks people out.

Hookworms and whipworms are more deceptive. You generally won’t see them in the stool. They’re small and tend to stay attached inside the intestine. The first clue is not visual—it’s symptoms like diarrhea, dark stools, or weakness. Often, the stool appears normal, but lab tests reveal a different story.

What People Often Mistake for Worms

I’ve lost count of how many times I’ve been shown something that looked like a worm—but wasn’t.

Undigested food is the biggest culprit. Things like grass fibers, vegetable strands, or even bits of fabric can pass through, looking eerily worm-like. One client brought in what they were sure were worms, but it turned out their dog had gotten into a mop head.

Mucus in stool can also look like worms. It has a slimy, stringy appearance and can be mistaken at a glance. The difference: mucus breaks apart easily, unlike real worms.

This is why I always recommend against jumping to conclusions based on a single glance. If you’re unsure, a quick fecal exam at a clinic can settle it.

What Fresh vs. Old Worms Look Like

Here’s something most people don’t realize until they’ve seen it firsthand: worms change appearance quickly.

Fresh worms are often moist, slightly shiny, and may even move. Tapeworm segments, in particular, can contract and expand briefly after being passed.

After a few hours, they dry out. Tapeworm segments that once looked like rice can resemble sesame seeds. Roundworms lose their sheen and become stiff. I had a case where a client only noticed the dried segments days later on their dog’s blanket and had no idea they’d been there the whole time.

Timing matters when you’re trying to identify what you’re seeing.

Where You’ll Notice Them Besides Poop

Sometimes, the first sign isn’t in the stool at all.

I’ve had owners come in because their dog was scooting excessively. Often, that’s due to irritation from tapeworm segments around the anus. You might also see them stuck in fur or on bedding.

In heavy infestations, especially in puppies, worms can appear in vomit. That’s usually roundworms, and it tends to alarm people more than anything in stool.

Worms in Dog Poop

Mistakes I See Dog Owners Make

One of the most common mistakes is waiting too long. I understand the hesitation—no one wants to overreact—but parasites don’t resolve on their own. I’ve seen mild cases turn into serious weight loss or anemia, particularly with hookworms in young dogs.

Another mistake is using over-the-counter treatments without proper identification. Not all dewormers treat all worms. I’ve had clients try multiple products with no success, only to find out they were targeting the wrong parasite entirely.

And then there’s the assumption that indoor dogs are safe. Fleas can carry tapeworms, and I’ve treated plenty of dogs who never set foot outside but still ended up infected.

What I Usually Recommend in Practice

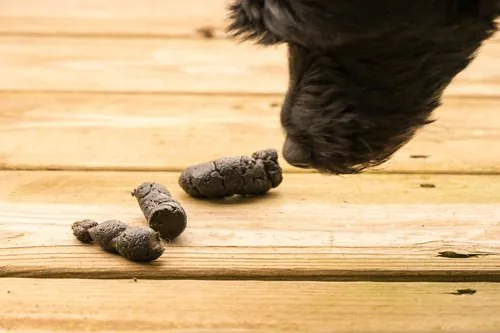
If you see anything suspicious in your dog’s stool, collect a fresh sample and bring it to your veterinarian as soon as possible for analysis. Erring on the side of caution helps catch problems before they worsen. In most cases, treatment is straightforward once we know what we’re dealing with. Deworming medications are effective, but they need to match the parasite. I also usually recommend follow-up testing to ensure the infection is fully cleared.

Prevention is crucial. Maintain a regular deworming schedule as recommended by your vet, use effective flea control consistently, and practice good hygiene by promptly cleaning up after your dog. These steps help prevent reinfection and keep your dog healthy.

A Final Thought from the Exam Room

One case that stuck with me involved a first-time dog owner who nearly gave up their puppy because they thought the worms meant they’d done something wrong. The reality is, parasites are incredibly common, especially in young dogs.

Catching it early, recognizing what you’re seeing, and acting on it—that’s what makes the difference.

If you’re looking at your dog’s poop and wondering whether that strange shape or movement is normal, trust your instincts. In my experience, owners are often justified in being suspicious.

Use a Dremel to Trim Dog Nails
Mar
How I Use a Dremel to Trim Dog Nails (Without Stress or Bloodshed)

A Complete Guide You Should Know

I have worked as a professional dog groomer for years, and the Dremel has truly transformed how I manage nail care. At first, I doubted its effectiveness, especially with nervous dogs, but learning to use it correctly changed my perspective.

If you’ve struggled with nail clippers, quickening your dog, or just dealing with the anxiety that comes with nail trims, a Dremel can be a game-changer. But only if you approach it the right way.

Why I Prefer a Dremel Over Clippers

I still use clippers occasionally, but I reach for the Dremel far more often now. The biggest reason is control.

With clippers, you’re making a cut—and if you misjudge the quick, there’s no undo button, which can cause pain or bleeding. With a Dremel, you’re gradually grinding the nail down, and you have more time to notice and avoid the quick.

I once worked with a rescue dog who had extremely overgrown nails that curled slightly inward. Clippers would have been risky. With a Dremel, I slowly reshaped the nails over a few sessions without causing pain. That’s when I fully trusted the tool.

Getting Your Dog Comfortable First

This is where most people go wrong. They turn the Dremel on and go straight for the paw.

In my experience, that almost always backfires.

Dogs need to get used to two things: sound and vibration. I usually start by letting the dog sniff the Dremel off. Then I turn it on for a few seconds at a distance just so they can hear it.

I worked with a young Labrador last spring who would pull away at the sound. So instead of forcing it, I spent a few minutes each day just turning the Dremel on and off near him while giving treats. Within a week, he stopped reacting completely.

Patience here saves you a lot of struggle later.

How I Actually Use the Dremel

Once the dog is calm, I hold the paw firmly but gently. You don’t want to squeeze, but you also can’t be hesitant.

I bring the Dremel to the nail at a slight angle and touch it for a second or two each time—holding it in one spot for too long is a common error.

Short bursts are key.

Don’t try to finish the nail all at once. Gradually shape it, rotating around the nail to smooth edges as you go.

One detail that took me time to learn: heat builds up quickly. If you keep the Dremel on a single nail for too long, it can become uncomfortable for the dog. I usually alternate between paws to avoid that.

Use a Dremel to Trim Dog Nails

Knowing When to Stop

This is where experience really matters.

As you grind down the nail, you’ll start to see a darker center appear—that’s the quick getting close. On light-colored nails, it’s easier to spot. On dark nails, you have to rely more on caution.

I had a client bring in a small terrier whose previous groomer had clipped him badly. The dog flinched at every touch after that. With him, I took an extremely conservative approach—just a little grinding each visit. Over time, the quick receded, and we were able to get the nails back to a healthy length.

That’s something many owners don’t realize: regular grinding can encourage the quick to shrink back over time. However, grinding too close, too fast, or ignoring signs of discomfort can hurt your dog, so proceed slowly and stop if your dog pulls away or shows signs of distress. Rushing is a big issue. Many think nail trims take five minutes. For some dogs, maybe—but not most.

Another mistake is pressing too hard—let the Dremel work. Pressure creates heat and discomfort.

I also see people skipping desensitization altogether. They assume their dog will “just deal with it.” That’s how you end up with a dog that hides when you bring the tool out.

And finally, poor positioning. If your dog is squirming or standing awkwardly, you’re setting yourself up for a bad experience. I often work with dogs on a non-slip surface or even on my lap for smaller breeds. Stability makes everything easier.

A Few Practical Tips From Experience

  • Start on the lowest speed setting. Hi, start on the lowest speed setting. High speeds can be overwhelming and may cause burns more easily. Always check that your Dremel’s attachments are secure before starting. the beginning. Even one or two nails is progress.
  • Use treats generously. I’ve turned many “difficult” dogs into cooperative ones by pairing the Dremel with rewards.
  • Check your sanding band regularly. A worn band doesn’t grind effectively, leading to increased friction.

When I Don’t Use a Dremel

Despite how much I like it, there are situations where I switch back to clippers.

Very small puppies often do better with quick snips; their nails are soft and tiny. Extremely anxious dogs may need slower introductions before trying a Dremel.

I’ve also had older dogs with arthritis who don’t tolerate having their paws held for long. In those cases, speed matters more than precision, so I adapt.

The Difference It Makes

Once you get the hang of it, using a Dremel feels less like a chore and more like routine maintenance.

I’ve seen dogs go from resisting nail trims entirely to calmly sitting through a session. Owners often tell me they avoided trimming nails for months because of fear—both theirs and the dog’s. With the right approach, that fear fades.

It’s not about mastering a tool. It’s about understanding your dog, working at their pace, and building trust one nail at a time.

Dogs With an Upset Stomach
Mar
What I Actually Give Dogs With an Upset Stomach (After Years in Practice)

Everything You Need to Know

I’ve been working as a small-animal veterinarian for over a decade, and if there’s one issue I see almost daily, it’s upset stomachs in dogs. Sometimes it’s mild—just a bit of vomiting after eating something questionable. Other times, it’s more serious. But most cases fall somewhere in the middle, and knowing what to give (and what to avoid) makes a real difference.

Over the years, I’ve developed a pretty practical approach. Not textbook-perfect, but grounded in what actually works for real dogs in real homes.

First, I Look at the Cause (Even at Home, You Should Too)

Before I recommend anything, I try to figure out why the dog’s stomach is upset. That matters more than people realize.

A dog that got into greasy leftovers behaves very differently from one with a stomach bug or food intolerance. I remember a case not long ago—a young Labrador that had been vomiting all morning. The owner was worried it was something serious, but it turned out the dog had eaten half a buttered naan from the kitchen counter. Classic.

In simple cases like that, treatment is usually straightforward.

What I Usually Recommend First: Let the Stomach Rest

This is the step many owners skip, and it’s often the most helpful.

For mild vomiting, I typically advise withholding food for about 12 hours (for adult dogs). Water should still be available, but in small amounts if the dog is vomiting frequently.

I’ve seen many cases resolve just with this alone. A client once called me in a panic because her dog had vomited three times overnight. By the time she came in the next day—after holding food for half a day—the dog was already acting normal again.

The Bland Diet That Actually Works

Once vomiting has settled, I almost always recommend a bland diet. In my clinic, this is one of the most reliable tools we have.

The classic combination:

  • Boiled chicken (no skin, no salt)
  • Plain white rice

I’ve used this thousands of times, and it works because it’s easy to digest and gentle on the stomach.

I remember treating an older mixed-breed dog that had recurring stomach issues. The owner had tried switching between expensive commercial foods with no success. When we moved the dog to a simple chicken-and-rice diet for a few days during flare-ups, the difference was immediate—less vomiting, firmer stools, and a much calmer dog overall.

Feed small portions, several times a day. Don’t rush back to normal food too quickly—this is another common mistake I see.

What About Yogurt or Probiotics?

This is where my opinion is a bit more selective.

Plain yogurt can help in some cases because of the probiotics, but not all dogs tolerate dairy well. I’ve seen dogs get worse after yogurt, especially those already dealing with diarrhea.

If I want to support gut health, I usually recommend a high-quality canine probiotic rather than guessing with household foods. In the clinic, we use veterinary-grade options because they’re more predictable.

When I Use Pumpkin (And When I Don’t)

Plain canned pumpkin (not pie filling) can be helpful, especially for diarrhea. It adds fiber and can help regulate digestion.

But here’s something I’ve learned the hard way—it’s not a cure-all.

A few years back, a client kept giving pumpkin to a dog that had ongoing vomiting. The problem wasn’t digestion—it was a foreign object the dog had swallowed. Pumpkin didn’t help, and it delayed proper treatment.

So yes, pumpkin can help with mild digestive upset, but if symptoms persist, it’s not the solution.

Dogs With an Upset Stomach

What I Avoid Giving Dogs With Upset Stomachs

Some things cause more harm than good, and I’ve seen enough cases to be firm about this.

I strongly advise against:

  • Fatty foods (like leftovers or fried items)
  • Milk (often worsens diarrhea)
  • Human medications without veterinary guidance

One case that stuck with me involved a dog given over-the-counter human medication. The owner meant well, but it led to complications that required hospitalization. Since then, I always emphasize—don’t guess with medications.

Hydration Matters More Than Most People Think

If a dog is vomiting or has diarrhea, dehydration becomes a real concern.

I usually tell owners to watch how the dog drinks. Small, frequent sips are better than letting them gulp water all at once.

In more stubborn cases, I’ve had to give fluids at the clinic because the dog simply couldn’t keep anything down. That’s often the tipping point where home care isn’t enough.

When I Tell Owners to Stop Home Treatment

There’s a line between simple care and medical attention. Over the years, I’ve learned to recognize it quickly.

If a dog shows any of these signs, I don’t recommend waiting:

  • Vomiting for more than a day
  • Blood in vomit or stool
  • Lethargy or weakness
  • Refusing water
  • Signs of pain (restlessness, whining, hunched posture)

I once treated a dog whose owner waited several days, assuming it was just an upset stomach. It turned out to be a blockage. Earlier intervention would have made things much easier—for both the dog and the owner.

My Practical Take After Years of Cases

Most mild upset stomachs in dogs can be managed at home with three simple steps: rest the stomach, reintroduce food slowly with something bland, and maintain hydration.

But what really separates a smooth recovery from a complicated one is judgment—knowing when it’s just a temporary issue and when it’s something more serious.

If there’s one thing I’ve learned after years in practice, it’s this: simple remedies work well, but only when they’re used at the right time for the right reason.

Feed Popcorn to Your Dog
Mar
How to Safely Feed Popcorn to Your Dog

What I Tell Clients in My Exam Room

I’ve had this question come up more times than you’d expect—usually right after a movie night gone wrong. As a practicing small-animal veterinarian, I’ve seen everything from mildly gassy dogs to one particularly memorable case of a painful dental fracture, all tied back to popcorn.

The short answer? Plain popcorn can be okay for dogs in small amounts. But the way most people serve it makes it a bad idea.

Let me explain how I look at it in real life, not just in theory.

The First Time Popcorn Became a Problem

A few winters ago, a client brought in her Labrador after a family movie night. The dog had been happily catching popcorn in the air—until he wasn’t. By morning, he was drooling, pawing at his mouth, and refusing breakfast.

We found a partially cracked molar. The culprit wasn’t the fluffy popcorn—it was an unpopped kernel. Those little hard bits are tough enough to damage teeth, especially in enthusiastic eaters.

Since then, I’ve been very clear with clients: popcorn itself isn’t the main issue. It’s the details.

Plain Popcorn vs. “Human” Popcorn

If you strip popcorn down to its basics—air-popped, unsalted, unbuttered—it’s not toxic to dogs. In fact, it contains small amounts of fiber and minerals.

But that’s not how most people eat popcorn.

In my experience, dogs don’t get into plain popcorn. They get into:

  • Buttered popcorn dripping with fat
  • Heavily salted movie-style popcorn
  • Caramel or flavored varieties

And that’s where problems start.

I once treated a small mixed-breed dog who had eaten a bowl of buttery popcorn left on a coffee table. He came in with vomiting and diarrhea that lasted a couple of days. Nothing life-threatening, but definitely uncomfortable—and avoidable.

Feed Popcorn to Your Dog

The Real Risks I See in Practice

Over the years, a few patterns have become clear.

  1. Unpopped kernels are trouble

These are my biggest concerns. They can crack teeth or get stuck between them. I’ve removed more than a few from gum lines during exams.

  1. Butter and oil can upset the stomach

Rich, fatty foods don’t sit well with many dogs. Some develop diarrhea quickly; others get more serious inflammation like pancreatitis, especially if they’re prone to it.

  1. Salt adds up fast

A few pieces won’t hurt, but regular exposure to salty snacks can contribute to dehydration and long-term health issues.

  1. Portion size is often the hidden problem

People think, “It’s just popcorn,” and end up sharing half a bowl. Even safe foods become a problem in excess.

A Case That Changed How I Advise Owners

One case that stuck with me involved an older spaniel with dental disease. The owner had been giving him popcorn regularly as a “light snack.”

Over time, the combination of weak teeth and hard kernels led to multiple fractures. We had to extract several teeth to relieve his pain.

That was the moment I stopped saying popcorn is “fine in moderation” without explaining exactly what moderation looks like.

So, Can Dogs Eat Popcorn?

Yes—but only under specific conditions.

If a client asks me directly, I usually say:

  • Air-popped only
  • No butter, no salt, no flavorings
  • No unpopped kernels
  • Very small amounts

And even then, I add that it’s not something I actively recommend. There are simply better treatment options that don’t carry these risks.

What I Personally Do With My Own Dog

I have a dog at home, and yes—he’s tried popcorn. The first time, he loved it. But after seeing what I see in the clinic, I don’t make it a habit.

If I ever share it, I pick out a few fully popped, plain pieces and hand them over one at a time. No bowl on the floor. No free access.

That level of control matters more than people realize.

Common Mistakes I See Owners Make

The biggest issue isn’t popcorn itself—it’s how casually it’s given.

I’ve seen owners:

  • Toss handfuls without checking for kernels.
  • Share flavored popcorn without thinking about ingredients.
  • Leave bowls unattended where dogs can overeat

These are small moments, but they add up to real problems in a clinic setting.

My Bottom-Line Advice

If you’re careful, plain popcorn can be an occasional treat. But it’s not a great one.

From where I sit—exam room after exam room—it’s simply not worth the risk when safer options are available. Most dogs don’t need popcorn, and they certainly won’t miss it.

I’ve learned to judge treats not by whether they’re technically “safe,” but by how often they lead to avoidable issues. Popcorn lands in that gray area.

And in my line of work, gray areas are where I see the most trouble.

Toyger Cat Prices
Mar
Understanding Toyger Cat Prices: Insights from a Breeder’s Perspective

As a breeder with over a decade of experience working with exotic-looking domestic cats, I’ve been asked countless times about Toyger cats, specifically their price. These cats are striking, with their tiger-like stripes and muscular build, but that beauty comes at a price that varies widely depending on several factors.

I’ve helped several families over the years navigate these decisions, and I want to share my experience to give a realistic picture of what to expect.

Breeding and Appearance: What Drives the Price

I always explain to potential owners that a Toyger’s price reflects the careful breeding that goes into their look. Early on, I saw that kittens from champion lines with ideal striping and facial structure can cost thousands more than those from standard pairs. For instance, a customer last spring wanted a kitten with clear tiger-like markings; the breeder’s higher quote was justified by the kitten’s pattern and health record.

Age and Pedigree: Key Cost Factors

Age and pedigree matter, too. Newborn Toyger kittens are priced differently from adults, especially those shown or successfully bred. I worked with a couple wanting a young adult Toyger from Show Champions. The price reflected not just the cat’s present state, but also years of selective breeding and veterinary care. Many underestimate the cost of responsible breeding—vaccinations, early socialization, and screenings can cost several hundred dollars per kitten before sale.

Location and Availability

Location is another factor that affects Toyger prices. I’ve noticed that buyers in urban areas tend to see higher prices, often due to limited availability and the cost of transporting these cats safely. When a client from Texas wanted to bring a kitten from a breeder in the Northeast, the transportation and care involved added a noticeable chunk to the overall price.

From my perspective, it’s better to pay a bit more for a kitten from a reputable breeder than risk getting one from a source with an uncertain health history.

Toyger Cat Prices

Beyond the Purchase Price

In addition to the pure purchase price, I always remind owners to factor in long-term costs. Toygers are active, intelligent cats that thrive on interaction, so investing in toys, climbing structures, and regular veterinary care is essential.

I recall a family who purchased a kitten for a standard market price, but without anticipating the stimulation and space needs, the kitten became stressed. Helping them adjust to the environment was as important as the cat’s initial cost.

Health and Temperament Over Price

Another common mistake I’ve seen is focusing solely on price rather than health and temperament. One client was tempted by a slightly cheaper kitten with less-defined markings. After a health check, we discovered minor issues that would have cost more in the long run. In my experience, prioritizing health, temperament, and breeder reputation over the absolute cost ensures a happier outcome for both the cat and the family.

Final Thoughts

Toyger prices reflect genetics, lineage, age, and breeder quality. You’ll find a range from several thousand and higher, depending on these factors, but the investment is often worth it for a healthy, well-adjusted Toyger. Careful selection ensures a lasting bond with these cats.